Monday, 19 May 2014

panzergrenadiers finished

The panzergrenadiers are finished.   


And the vehicles. 


And another picture of the panzergrenadiers. 

Next task will be to finish the 6mm Anglo-Saxons.   

Sunday, 11 May 2014

Nice little accident

I had an interesting little modelling accident today.  I was doing the bases for Flames of War panzergrenadiers I'm painting for a friend and instead of using a standard filler, I decided to use some old green Basetex I had.  I reckoned if I scattered on some heavier grit and some sand it would all provide a good base for painting.  

When I had finished I thought the bases looked quite good on their own and I like the different colours in the stones.  I'll still paint them, but I took some photos first just to preserve what they looked like.  


Wednesday, 2 April 2014

6mm ... still going

The 6mm Saxons are still progressing. All the cloaks are done and the shields have been given a white undercoat to make the final colours a bit brighter.  Here are back and front views of the figures so far.   


After the shields, I'll have to finish the spears, and helmets, hats, hair and any metalwork. Then I'm nearly done.  

Tanks finished

Tanks are done. I may have missed something, but I reckon that's them. I'm not sure how much of the piping on the uniforms will appear on the pictures. The Pz III crews have yellow piping as they represent the 24th Pz Div while the Pz IV have the more traditional pink.    


Wednesday, 26 March 2014

Next steps on the tanks

Here's the nextsteps.  A bit of highlighting, steel on the tracks and some patches of rust.  I'm not sure how much will show in the photos.   

I did these bits before I received the welcome suggestions from friends of how to vary the gray appearance.   I'll follow up on the ideas of adding flags for recognition from the air and chips or scratches in the grey paint to show the red basecoat.  


  I'll cut some paper flags and place them on the rear hull of a couple of tanks.  But I don't really want to do the swastika in a white circle on a red background.  I did start to wonder if there's any evidence of units using panels or flags with an enlarged version of their divisional sign.  Since these tanks will represent the 14th and 24th panzer, I may well do a test of a red flag with the yellow symbol of the 14th, and maybe a yellow flag with the horse rider symbol for the 24th.  

Sunday, 23 March 2014

and another little project - vehicles for FoW

Recently a club member asked me if I would paint some German vehicles for him.  I agreed and after a bit of discussion he specified what he wanted - basically grey vehicles for the period mid-1942 to Stalingrad and for the 14th and 24th Panzer divisions.  

The models themselves are from The Plastic Solder company and they went together really well. I've become a fan of the Plastic Soldier Company - not least because they're half the price of the stuff from Battlefront.  

Anyhoo - he's some pictures.  5 panzer III and 5 Panzer IV models have been assembled and undercoated with that well-known base-coat for German vehicles, Halfords undercoaten-grau. 
I then gave the models a couple of washes with a thinned down black and then did the running gear with a couple of heavier washes of black.  I added a spash of steel to some tracks, just to gauge how it was all hanging together at this point.     


Not too bad for this stage.  Of couse, the big challenge is really to make grey seem interesting.  There will be more shading and highlighting to come, and various deck-top tools and stuff will provide a little colour.  But I'm still wondering what else I can do to add to the models.  I can add some rust to the tracks, then some mud or dust to tracks and road wheels, and then maybe do the commanders in a mix of black and grey uniforms.  Hopefully some or all of that should balance out the grey.  And perhaps red over white platoon vehicle numbers if they're appropriate for this period.       

More later.   

Tuesday, 11 February 2014

joys of the white undercoat - part 2

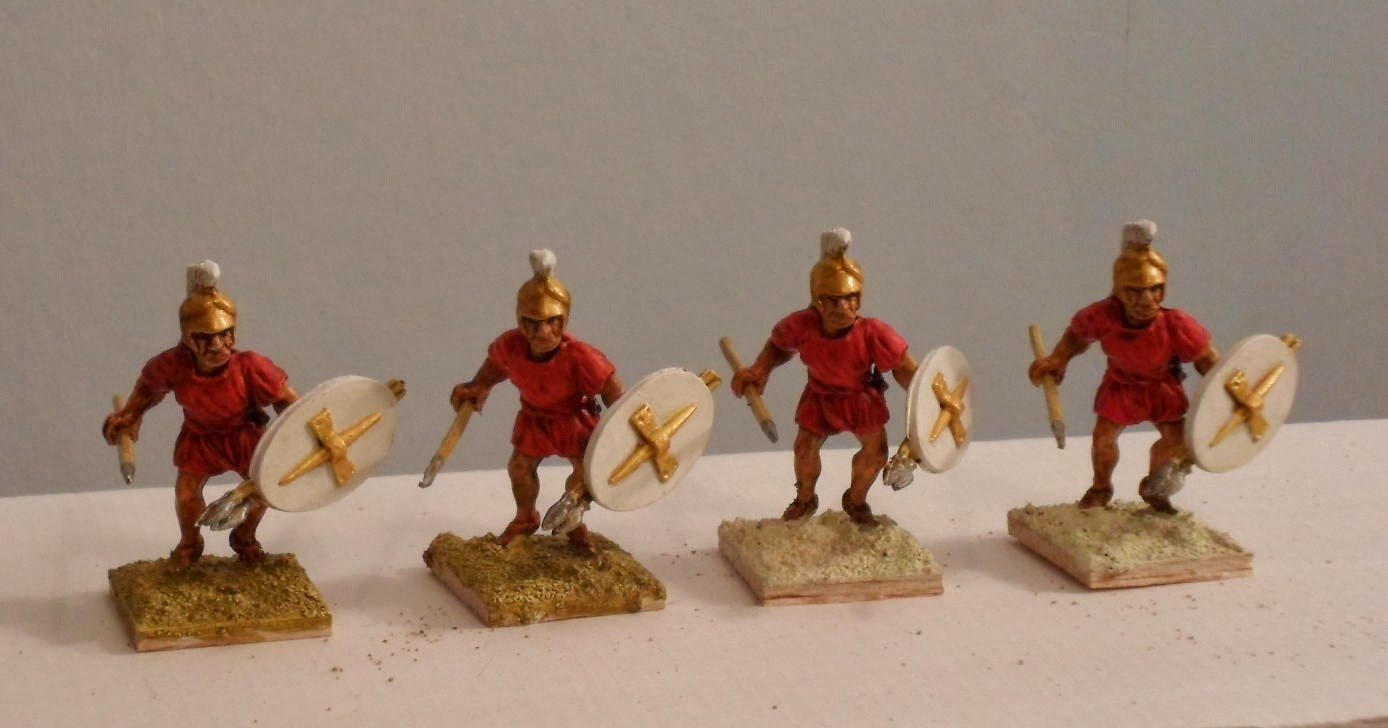
... to continue.  The last post ended with the figures basically finished. These are Essex 25/28mm peltast types intended to be used as part of a late Seleucid elephant escort.
Now comes the final wash and basing. 

I probably don't need to do the final shading wash, but I like it and it's served me fairly well for the past 25 years or so. I use a mix of a little burnt umber oil paint, white spirit and liquin to help the oil paint dry. The advantage with oil paint is I can work it as it stays fluid, so if I apply a mix that's too dark then I just add white spirit and liquin and brush off any excess.  (For younger viewers, just think of it as DIY army-painter.)      
This is after the final shading wash. I forgot to say that the figure on the left has a dark red tunic, the next from left has a scarlet tunic, then the two with the bright red tunics - all just for a bit of variation.  For this exercise I was too lazy to add border or edge stripes to the tunics.      

Added scattered sand to polyfilla on the base. I don't use PVA.   

And one thing with using liquin and oil paint is it can be a bit shiny, even with white spirit added. So I put a matt varnish over the tunics and helmet crest. The rest I left.  
I also did the eyes because I forgot to do them earlier. I used burnt umber for eyes and eyebrows. I don't use white at all, so no goggle-eyed stares from these chaps.   
Painted over the sand with a cream colour from a sampler pot from local DIY store. It helps to seal the sand or grit. The figures on the right have the basic colour. The two figures on the left have the bases with a khaki wash. 

All bases with a khaki wash and the two on the left given a dry-brush with sand, then a top dry-brush with cream.  Probably doesn't really need the cream.  

Then add a little static grass. I didn't want to do too much, but a little just adds another bit of contrasting colour. 

And so 'tis done. But always a good idea for me to check round the figures, just in case I missed something.  


That seems OK. They'll pass the 3 foot test anyway and that's good enough. 

A final picture from lower down trying to capture some of the faces. Hopefully they look like they mean business. Sometimes I think I should have added a five-o'clock shadow to the jawline, but enough is enough. Overall, not too bad for a couple of hours or so over 3 nights.

Now I just have to finish off the rest of the Seleucids.